Setting up SmartDNS with Overplay
We are big fans of Overplay, and their SmartDNS technology. It’s a little bit of magic that works by allowing you to switch between services, like Netflix USA and BBC iPlayer without having to log out from one VPN server and log in to another VPN server.
There are two main ways you can set SmartDNS up, either per device (our choice) or on your router. The advantage of using it on your router is that you don’t need to configure each device, but this of course can be more complicated or not even possible depending on what type of router you have. As there are many types of routers on the market, we can’t possibly give a guide on how to configure SmartDNS with your router, so we will show you how to set it up per device instead.
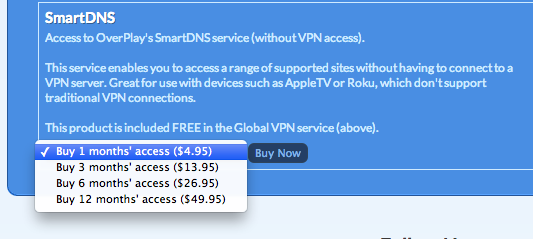
How much does it cost ?
The current prices are as follows
- 1 month SmartDNS : $4.95
- 3 months SmartDNS : $13.95
- 6 months SmartDNS : $26.95
- 12 months SmartDNS : $49.95
Mac Setup for SmartDNS
Here are the steps to set up your Mac with Smart DNS
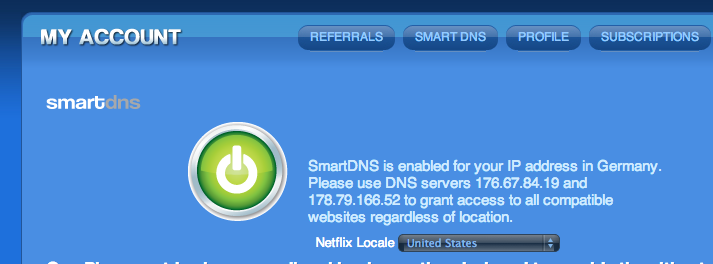
1)Log in to Overplay
Once you are logged into your Overplay.net account, you’ll need to select the Smart DNS tab. Here you will see two IP addresses possibly starting with 176 or 178. Note down these numbers. Also on this screen you can set your home Netflix preferences. This can come in useful as depending on where you are you might see a different Netflix library.
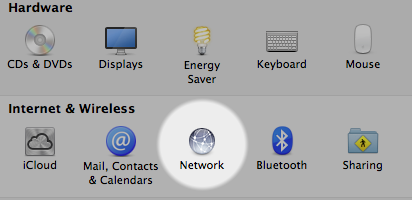
2)Open System Preferences
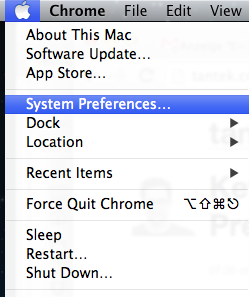
Click on the symbol on the top left hand corner of your computers screen and select ‘System Preferences’. Locate the ‘Network’ settings under ‘Internet & Wireless’
3) Create a new location
For ease of use we recommend you set up a new location based network, this will allow you to disable SmartDNS in a few clicks.
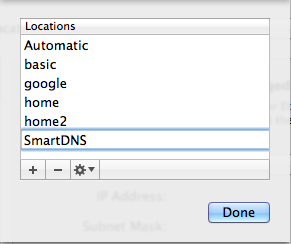
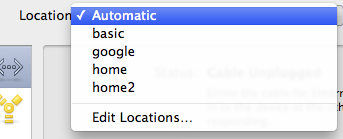 Click on the ‘Location’ drop down bar and select ‘Edit Locations…’. By clicking on the + on the next window you will be able to get a new location profile, name it something like SmartDNS.
Sign up
Sign up for Overplay.
4) Enter in the DNS settings
To add in the DNS settings you will need to click on the ‘Advanced…’ button on the bottom right hand side of the Network panel. You will now need to find the DNS tab.

In the DNS tab you will need to add in the 2 IP addresses from part 1, in the DNS server section. 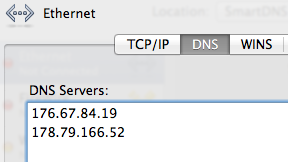
Click ‘OK’ to save these settings, and then ‘Apply’ to tell your Mac to take over these settings. Now your internet connection will be configured to use the SmartDNS and you can surf away as normal !
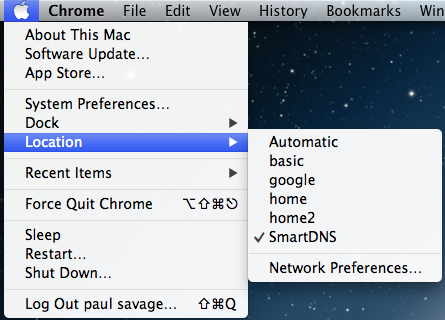
Bonus : Switch between network locations quickly
If you want to easily and quickly change between using SmartDNS and your normal ISP DNS servers, you can switch by clicking on the symbol on the top left hand side of the page and then going to locations. Here you will see all the network locations you’ve added.
Sign up
Sign up for Overplay.
Windows Setup for SmartDNS
For Windows users its a little bit easier, you just need to download this program & install it. Once you’ve downloaded it, open it up and enter your overplay username and password and away you go!
April 2016: The DNS settings are now
Primary: 209.107.219.3
Secondary: 64.145.73.2